Optimizing Brewery CIP Systems: Part 2
The second part of a two-part series on clean-in-place systems for brewing operations covers techniques for cleaning tanks and pipes, the importance of time in a cleaning cycle, and strategies for change management.
Editor’s note: This is the second in a two-part series highlighting the challenges of and strategies for implementing clean-in-place systems for brewing operations. The first part was published in the February 2025 edition.

Cleaning Action – One Size Does Not Fit All
One thing is certain about cleaning action: one size definitely does not fit all. First off, we must ask ourselves, are we cleaning a vessel or a pipe? The expectations and settings of our clean-in-place (CIP) equipment are directly influenced by the type of asset being cleaned (see Figure 4). Let’s explore that for a moment.
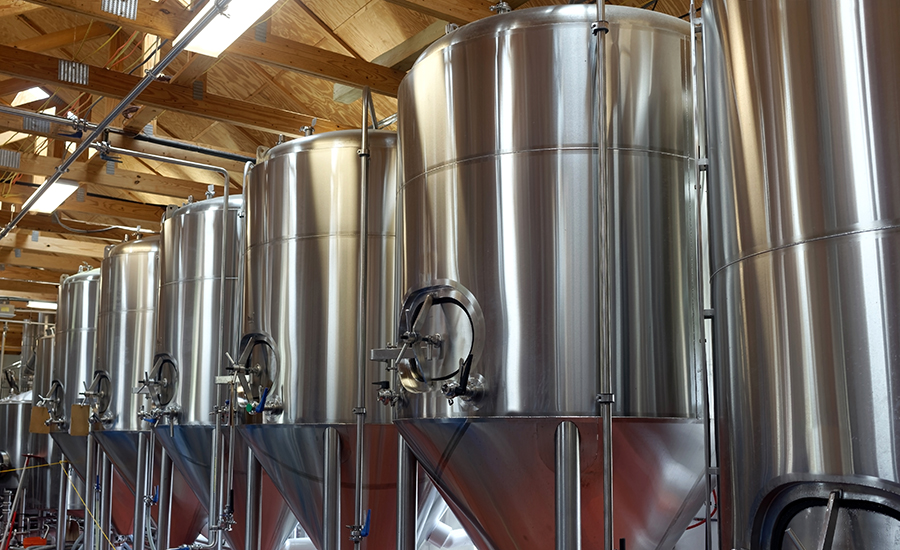
Tanks: Supply Pressure & Keeping it Empty
What device is responsible for delivering vessel cleaning solutions? In almost every case that would be a spray ball or cleaning machine. These devices operate at manufacturer-defined pressures and flow rates, and we need to ensure that our CIP system is delivering within their specifications. Running outside these limits risks a degraded tank cleaning and may translate into wasted resources and quality risks.
In parallel, it is our goal to minimize level build up in the vessel. We are looking for impingement of the tank internals and cascading effects to achieve ideal cleaning action. Portions of the tank that are flooded will not be exposed to sufficient mechanical action and may not be cleaned as effectively. To ensure a nearly empty vessel, the CIP system also needs to be able to remove cleaning solution at or above its supply volume. This is the difference between soaking a casserole pan in the sink versus washing it under running water. Which method works best in your experience?
Fortunately, our previous process flow diagram (PFD) work documented the optimal pressure and flow rate at which this vessel will be cleaned – a valuable use of our time. With cleaning device details in hand, we will now look upstream and downstream at the two main CIP circuit pumps – CIP supply (CSS) and CIP return (CSR) – to determine their ability to provide the target supply pressure and flow rate, and remove cleaning solution to maintain a (near) empty tank. This will involve a look at the pump curves, or if not familiar with such charts, a call into your pump’s technical resource. In either scenario, the information documented in the PFD (pump model, impeller diameter, motor details) will quickly get you the answers.
Pipes: Fully Packed for Turbulent Cleaning Conditions
Cleaning a pipe/header requires us to take a different approach. Unlike tanks, which are typically cleaned to a target pressure and need to be empty to achieve ideal mechanical cleaning, pipes need to be completely full and need turbulence for cleaning action. Turbulence is achieved through targeting flow rates that are a function of line diameter.
Having said that, the process is the same as before. Again, we refer to our PFD details for pipe and pump information and identify the CSS flow capabilities on the pump curve. Next, these are compared to resources available online or through pipe suppliers to determine the minimum flow rate needed to achieve turbulent flow. Always select the largest pipe diameter in the circuit to set minimum flow.

Time – It’s More Important Than You Think
What remains to achieve an ideal CIP? Time. The fourth and perhaps least understood aspect of cleaning. Knowing exactly how long it takes to clean, rinse and sanitize tanks and pipes elevates a CIP from what may once have been “just another job to do” to something that will improve your product quality, enhance your sustainability footprint and save money on chemicals and labor. OK, sounds amazing – how do we establish process times for each element of a CIP? Let’s take a look.
For vessels equipped with cleaning machines, vendors provide details on supply pressure, RPM and the number of revolutions required to complete one full wash cycle of the tank. Typically, higher cleaning solution supply pressures will result in an increase in RPM and the possibility of performing a tank wash in less time.
In Figure 5 below, you can see how a full cleaning cycle is achieved. Note how even with one pattern, the entire tank has been exposed to cleaning solution. Each subsequent pattern continues to fill in the spaces not initially impacted by the cleaning jet. Seeing and knowing how cycles and patterns work together is an important means to save time and water, particularly during pre-rinse, final rinse and sanitation. In these three scenarios, direct jet impingement of every square inch of the vessel is unnecessary because simply distributing, wetting vessel surfaces and cascading of the cleaning solution is sufficient. Only during caustic cleaning is a full cycle necessary to ensure a completely clean vessel.

Calculating Cycle Time
Time for a quick exercise. Let’s calculate the total time of a caustic cycle for our fermenter. From the cleaning machine manual, we determined that it takes 45 revolutions to complete one cycle. At our supply pressure of 125 PSI, our cleaning machine spins at 5 RPM. Here is the equation for cycle time:

For this example, the cycle time will be 9 minutes. Supplying caustic for less than this duration risks an incomplete cleaning. Time spent in caustic beyond what we calculated will yield diminishing returns and could be costing you production availability.
From what we just discussed, what would be an appropriate cycle time for a post-caustic rinse with process water? How many patterns are needed for a rinse? Give some thought to the purpose of a rinse. In such steps, we want to remove all traces of the caustic and return the tank to a neutral pH. With that, if you said that only one pattern is needed, you are on the right track. Running a fresh water rinse for 3 minutes would be a good starting point and would be verified through in-line monitoring or sample testing of the rinse water pH to ensure a complete rinse occurs.
Beyond the impact of time, think of the water savings available to you. Knowing the details of your CIP system equipment will result in savings in all forms.
For spray balls, we will take a different approach. Spray balls and pipes have much in common with regard to CIP time. In both cases, we need to perform each cleaning step in a “Price is Right” style – as long as necessary without going over. Fortunately, there are instruments and tools available to provide insight into our cleaning effectiveness as it is being performed.
CIP Effectiveness
An internal inspection of the vessel or piping is one of the most powerful and lowest-cost means to determine CIP effectiveness. Armed with nothing but a good flashlight, undesirables like solids, dried foams or residual films can easily be seen. Be certain to check all sides, vessel tops, the cleaning machine itself and piping for any signs of incomplete cleaning. It is recommended to perform these visual inspections at all points in a CIP – prior to pre-rinse, post-rinse, post-caustic wash and after final rinse. With this, you have knowledge of the before and after of each step and can make adjustments to the cleaning times as needed.
Another means of effectively quantifying a CIP is through the use of an inline turbidity sensor monitoring the return rinse and caustic solutions. As turbidity drops and maintains a zero value, the circuit may be considered clean and the CIP step may advance. Having said that, nothing replaces a visual inspection as a final confirmation of CIP effectiveness. Such an inspection need not be performed each time a CIP is run. Rather, consider this an audit of the system that should be scheduled on a routine basis.
We are at the home stretch. The current state of each CIP has been researched and recorded in an updated PFD. Temperatures, concentrations, cleaning actions, and cycle times are all known and verified. All good, right? Nearly. This amazing body of work – investigating, documenting, testing, validating – has resulted in CIPs that provide absolutely clean process contact surfaces and are completed in less time, using less water and chemicals. How are these successes guaranteed for the future? Welcome change management.
Manage Changes to Sustain Improvements
Change management can take numerous forms and be done in dozens of ways. For our work, its sole purpose is to provide continuous assurance that what we have learned and the successes we have achieved with our CIPs stay successful going forward.
Can you think of an instance where you or a colleague observed a process deviation? When reviewing what happened in a team meeting, did someone suggest something along the lines of “Just ask Tim to change the setpoint a bit. That will fix it.” Then, later that day, in a hasty hallway conversation, you ask Tim to make that process change and he does.
In this example, how do you feel about the solution vetting process? How well was the problem understood before proposing a process change? Are there any signs of documentation being performed? How well was this change communicated to production, quality and other stakeholders?
A Time-tested Change Management System
If you thought that this process change deserved better, you are correct. Scenarios like this happen daily. A single instance could be tolerated. However, it is the sum of the parts that slowly erodes away the foundation of our knowledge and allows uncertainty to creep back into our process. One of the most common and successful forms of change management is Plan-Do-Check-Act (PCDA). This time-tested system follows nearly the same steps we just used to improve our CIPs:
| Plan: |
|
Do: |
|
Check: |
|
Act: |
|
As with other problem-solving techniques, such as Lean or Six Sigma, the final undertaking of standardization in the Act Phase will ensure these improvements are now locked in and the process will not revert or deviate from its current state.